Debugging Pintos Visually

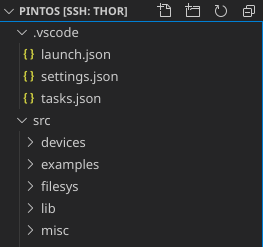
Steps

Step 1
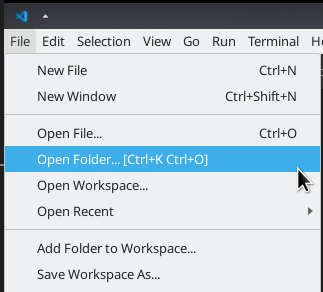
Open VSCode from the 'pintos' folder you copied to your home directory

Otherwise all the config paths will be messed up


Step 3
Add tasks.json
structure
.vscode/tasks.json
{ "tasks": [ { "label": "make", "type": "shell", "command": "make -C ${workspaceFolder}/src/threads/" }, { "label": "host debug", "type": "shell", "command": "cd ${workspaceFolder}/src/threads && ${workspaceFolder}/src/utils/pintos --gdb --gdb-port=1025 -v -k -T 20 --qemu -- -q run alarm-single", "dependsOn": "make", "isBackground": true, "problemMatcher": { "pattern": { "regexp": "(qemu-system-i386)", "line": 1 }, "background": { "activeOnStart": true, "beginsPattern": "(qemu-system-i386)", "endsPattern": "(qemu-system-i386)" } } } ], "version": "2.0.0" }

Step 4
Add launch.json
structure
.vscode/launch.json
{ // Use IntelliSense to learn about possible attributes. // Hover to view descriptions of existing attributes. // For more information, visit: https://go.microsoft.com/fwlink/?linkid=830387 "version": "0.2.0", "configurations": [ { "name": "build, host, and attach!", "type": "cppdbg", "request": "launch", "cwd": "${workspaceFolder}/src/threads", "miDebuggerServerAddress": "localhost:1025", "miDebuggerPath": "/usr/bin/gdb", "program": "build/kernel.o", "miDebuggerArgs": "-x ../utils/../misc/gdb-macros", "MIMode": "gdb", "setupCommands": [ { "description": "Enable pretty-printing for gdb", "text": "-enable-pretty-printing", "ignoreFailures": true }, ], "preLaunchTask": "host debug", } ] }

Step 5
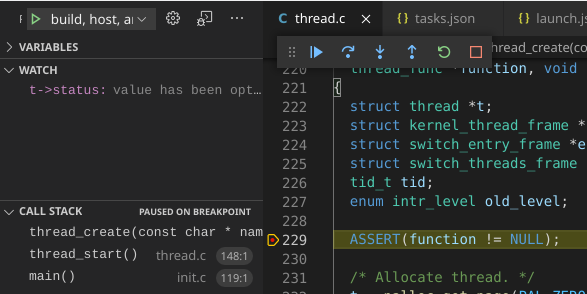
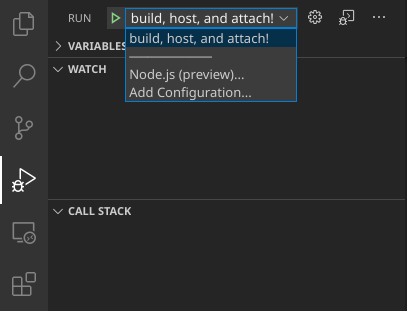
Select 'build, host, and attach!' from the debugger menu

Press the green play button or F5 on your keyboard

Debugging Pintos Visually


Why and How

Since we are not allowed to use Visual Studio Code's Remote-SSH feature and the sftp extensions have limited functionality, I decided to leverage vsc's task system to create something very similar to Remote-SSH. Below is a brief description of what tasks.json and launch.json are doing to accomplish this goal. If you'd rather just get your environment set up:


These tasks (.vscode/tasks.json) work by copying local src files to the teaching server using rsync.

rsync -av ${workspaceFolder}/pintos/src thor:~/CSE130/Lab2/pintos/

triggering make via ssh

ssh thor 'cd ~/CSE130/Lab2/pintos/src/threads && make'

and then starting up GDB such that it will wait and listen for connections on port 1025.

ssh thor 'cd ~/CSE130/Lab2/pintos/src/threads && ~/CSE130/Lab2/pintos/src/utils/pintos --gdb --gdb-port=1025 -v -k -T 20 --qemu -- -q run ${input:test}

In order to connect though, we have to open an ssh tunnel. This is because we are trying to access a program running on the server from our local machine.

ssh -L 1025:localhost:1025 thor

This makes it so that localhost:1025 on our local machine is connected to port 1025 on the remote server. Which by design, is the port that GDB is listening on.
Now that we have a way to communicate to the server, the launch task can connect using GDB as if we were running everything on our own local machine.


In order to avoid having to enter passwords over and over again, all of the commands relying on ssh take advantage of sshpass. Sshpass essentially forwards a plain text password to any ssh command.

sshpass -p <password> ssh thor


Set Up
Please make a back up of your Lab2 Folder before following this tutorial

Prerequisites

Windows

Install WSL
then follow linux

Linux

sudo apt-get install sshpass
Steps

Step 1
Modify your .ssh config so that it looks like the picture.
nano ~/.ssh/config
This will open the nano editor

CTRL-X to exit, y to save

Step 2
run the following command to clone Lab2 to your local machine
scp -r thor:~/CSE130/Lab2 .
This will copy Lab2 to the folder your command line is at.

This is your new working directory

Step 3
Important

Open VSCode from the 'Lab2' folder you just copied to your local machine

Otherwise all the config paths will be messed up


Step 5
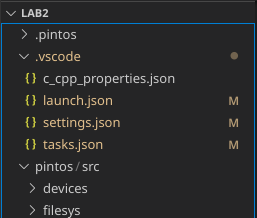
Download and extract this .vscode file and place it in your project structure like so.

W3Schools

.vscode

structure

Step 6
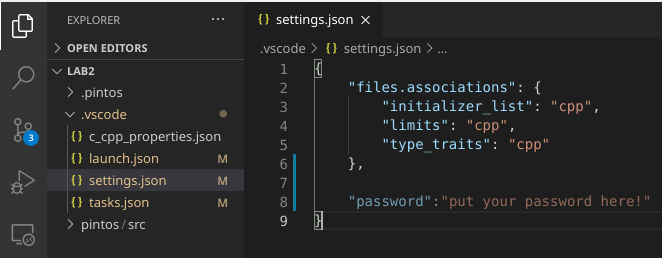
Replace password in .vscode/settings.json with your ssh password.


Step 7
Open an SSH tunnel to the teaching server
CTRL - SHIFT - B and select tunnel

The tunnel is configured to run on launch by default, however you must allow this when the notification appears.

Step 8
Select 'build, host, and attach!' from the debugger menu

Press the green play button or F5 on your keyboard